Showing posts with label photographing your art. Show all posts

Monday, August 27, 2012

Mr. DeMille, Oh, Mr. DeMille

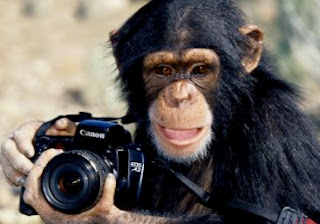
I'm ready for my close-up.


What is it with camera lenses?

This little "Viking" bowl just doesn't photograph well. Somehow, the camera distorts it. It's body is so much more rounded than it appears in shots. The has more of a smooth transition from flare to the tilted up points.
I've tried to take a good photo of this piece several times and so far, this is the best it has shown. I've set it up with a paper drape backdrop, used special full spectrum lights, tried every angle.

These shots are done just on my kitchen table with natural light from the adjacent window. Sheesh!
The glaze is a shino, fired in oxidation at between a cone 5 and 6. The glaze is from Coyote.

The bowl was thrown on a batt made from a sink off-cut --the piece that has been cut out of a kitchen counter for the sink. Or at least that's how the batts started to be made. I think now, they are just made as batts in the first place.

The slick finish on the batt allows me to let the porcelain dry on the batt. If I trim the outer edge of the foot at the time of throwing, I only have to burnish the bottom for a nice, smooth finish.

Thursday, January 20, 2011

2011

The Christmas tree has been down for a week or so. The decorations are all packed back in their boxes--I used to take everything down right after Christmas because I worried about the tree drying out and becoming a fire hazard. A couple of years ago, we bought an artificial one and it's okay, but I sure miss that great smell. Oh well.......

The house got a good New Year's clean. I finished sorting through my 'To File' file and gave the studio a good going over.

Time to regroup, to access and to think about 2011.

I spent the last few days sifting through my visuals stack--all the clip-outs of clay and other ideas, hints gleaned from the magazines I had received this last year. All my own notes and thoughts of new projects and ideas. It does get the juices flowing.....

It wasn't until I had sat down and sifted through all the little scraps, notes and various pages of my purse notebook that I realized what a great batch of things I had thought up at randum points in time. (After I read the book on Agatha Christie's notebooks--How in the World did that woman keep track of what she was doing? Even with notebooks**) I know that jotting down ideas as they pop in your head isn't such a bad idea after all.

**Agatha Christie's Secret Notebooks by John Curran.

I never go anywhere with some kind of small notebook. After I leave a show or while in a museum, I make rough sketches and notes (sometimes even too cryptic for me if I let them get cold) about what I have seen and what might be a good springboard for my own work. Sometimes, mixed in with that will be grocery lists, book titles, other reminders. I AM learning to use my iPhone to list book titles to look for, thereby avoiding the amnesia that always descends on me at the library or bookstore.

Anyway--


I have a new camera to learn how to use and have been taking some shots with it and the old camera to see if there is a difference--and there certainly is. An 8 GB video card just arrived in the mail.

I'm still finding there is work I have never photographed. And I will try to correct that in the coming year.


This is one of the first photos I took of a piece I made early on. This was before I took a class from Roger Schrieber, one of the best professional photographers there is, whose work can be seen at http://www.schreiberstudio.us/index.html.

It's out of focus, wrong angle, strange background (my driveway) at least it is a record for my own use. I usually take my own shots (in the basement, excluding all outside light, using a special bulb and neutral grey backdrop roll, tripod and my old SLR). I'm sure the new camera will do fine, but I won't have that great hands-on ability as much as with my old camera and it's beautiful lens.

I just uploaded a bunch of photos for my Gallery page on the Southern Arizona Clay Artists' Association website. With the exception of the big green teapot, which is a pro shot, they were all taken with the old camera.


I have no idea how the new camera will work. I won't really know until I can return to my set-up and get a new light bulb. It makes me wonder how long those special lights will be available......

Tuesday, September 22, 2009

iPhoto 8.1

There's a big difference between the old iPhoto and the newer edition. I prefer the old version. It's Edit mode was far easier to initiate; the new program requires extra steps. Not a big thing for one or two shots, but if you are processing a large collection, it can get a bit irritating.

The new iPhoto also seems awkward and dumbed down. With the old program, it was as if you were working with both hands; the new iPhoto's like working it with one hand behind the back.

You can't adjust the size and volume of images with as much ease. The bottom window must be moved out of the way to access the bottom corners of the 'crop' function. The straightening feature is nice. There is a 'balance scale' at the bottom of the image and a light grid for lining up the verticals in a shot. But be sure you straighten the photo before you crop it. Otherwise, you must go backward to access it.And will revert to the older version of the window if you crop first, then decide to straighten or level the shot. So you must return to crop and do that function again. Level first, then crop.


It is more difficult to access the data on size. With the older program, that information was available when you cropped and saved the image. With the new program, it isn't as forthcoming.

What I DO like in the new iPhoto is the capability to alter the overall image without going to Photoshop or another program. It's built right in and has a pretty good range.

At least enough for private family photos. You can lighten the exposure, 'warm up or cool down' the color, change the tint. That's really nice when working with old slides that have gone a bit blue with age or shots that were taken with too much or not enough light. I've been able to rehabilitate some old slides that would have been lost.

As far as slides of your work are concerned, it is my understanding that publications like Ceramics Monthly, Pottery Illustrated, etc. and some show juries and publishing editors will reject a slide outright if they see it has been processed through Photoshop or any other editing program.

Some people have told me the marking can removed, but frankly, that's just too much trouble for me. Better to take a really good slide in the first place. And if that's beyond your reach, get a set of good pro slides done.

Monday, September 21, 2009

Images-From Camera to Disk

When taking digital shots, I like to select the setting that will allow the largest format the camera will permit.

For instance, my camera is a Cannon Power Shot SD500. It can take Super Fine photos, but the video card will only hold 78 exposures. For Fine, I can get 125 shots. (By the way, you can also store a limited amount of stuff on a video card, though that could get pretty 'spendy.)

With most image handling computer programs, you can control the size of the export for storage. I like to store rather large images initially. You can always reduce them, but you sure can't make them bigger once they're reduced.

Storage disks with the largest memory are perfect for back-up. You can download a single image onto your computer without eating up too much memory.

I try to remember to print off at least one full-page color print of the image and file it away in a binder notebook as a portfolio page.

I label each disk and store in a crystal case. Make sure there's a good label or thumbnail shots of what is stored on the disk.

If you do this routinely, you will be prepared for whatever call for entry or request for work pictures that comes your way. And you'll also save yourself some 'digging time' trying to locate examples of your work.

Monday, April 21, 2008

Dragons


I don't have a kiln god--I have a kiln dragon. This fellow hangs on the wall near my kiln. I've had him for years and honestly can't remember when I got him. It must have been when we were stationed in Japan. Somebody must have given him to me, 'cause I wouldn't have bought him......He's made of all sorts of electronic wires and other plastic detritus. (The paper umbrella is my addition after we moved to the Pacific Northwest.)

Recently, I bought a slide converter--one of those great gizmos that converts 35 mm slides into digital files. I'm in the process of taking stacks of old family and art slides to store onto discs both for an art archive and to share the family ones with my children.

In the process, I ran across this old watercolor from many years ago. This was done in an experimental class dealing with creating paintings on very wet paper and manipulating the color runs. The title is "Realm of the Red Dragon".

See the resemblance? Hint: The head of the dragon is in the lower left-hand corner.

Thursday, March 13, 2008

The Easiest Photo Set-Up --- Ever


A chair, a roll of pro photographer's neutral grey background paper. Notice I have a thick pastel drawing pad to insure the seat is solid and level.


No clamps, no tape, just roll it out. Situate the chair to get the best natural sunlight.


Get a solid place to sit and steady the camera. Place the work gingerly in the center and shoot.


I use a Canon PowerShot SD500 with a 3x zoom lens.


For really serious photos, I use the set-up I have in my basement where there is absolutely no ambient light, a tungston light hung from the ceiling, a large paper sweep that comes from the ceiling to a tabletop. I bounce light back onto the base of the piece using a folded piece of foamcore or shiny gold card stock if the light needs a little warming.

That kind of photo set-up is how you get the really black top of the shot with the bright mid background and light grey surface where the piece sits, as shown in this shot.

Friday, February 29, 2008

The conversation between the salt and pepper


These characters just sorta 'happened'. I rolled out some terra cotta and began cutting out shapes and putting them together. Just a total surrender to the clay.

Wednesday, July 18, 2007

What a Difference a Glaze Makes

This tumbler didn't come out like I pictured it in my mind. The glazes ran 'way more than I expected, although I've done this before, but on a flat surface where they behaved themselves. This isn't quite IT overall. I want the base darker. I'll brush the rim to match and the flare at the bottom of the vessel, then wax the thing. Then do the body. This was an experiment: I threw the top and base separately. I scored the base heavily, bisqued them separately, then glazed both pieces and set them in the kiln on short kiln posts. (The inside of the base wasn't glazed.) Musta' been all those fumes because a couple of these guys got drunk and s-l-i-d ever so slightly off-center. I still like the look. It's worth repeating, I think.

"Cup Committee Meeting" When I photographed this group and looked at the result, I thought it looked as if they were all talking to each other. (I must eat lunch)

I had a lot of fun making these. I wanted them loose with interesting variations. They all have names: Sluggo, Unkempt Lady, Nose, Three Bumps, One Bump, Three Knuckles, etc. They came out pretty much like I expected. I mean, they're WHITE. Total emphasis on form here. I'll make these again, only bigger and more 'out there'. They're fun for you hand.

This tumbler was done after I did a series of smaller ones with more applied bumps. (Pictured below) It has a nicer shape, is larger and just classier looking. Not a whole lot of difference in the raw clay and finished piece. Easy to drink out of because of the lip-fitting flared top, Nice balance in the hand and easy to clean out because you can get your hand inside easily. I really like the size. It's about 10 oz. without filling to the top.

This is "Warts and All". This little devil and all his kin ran like a bandit. Pictured is the only surviver that can stand without leaning. Lovely interior, though, don'tchathink? A note will go in my glazing journal: Do NOT use this combo on anything vertical!


A cylinder form that has been paddled to make a square bottom works well with this glaze. It's a fake ash matt and the runs are very nice. Simple form/show-off glaze.


The grouping below is "Nice Family" because every one has one stamp at the bottom that is the same; the top stamp is different on each. This is a glaze combo I'm very comfortable with. I've used it before with stamped pieces and it pools nicely in the cavities. Celadon is always satisfying.

Smile for the camera, you mugs!

Unloaded my kiln and now I need to photograph the pieces. I have a set-up in my basement 'way back in the corner where I can exclude all light except a tungsten bulb in a clamp-on lamp. It's usually hanging from a floor joist.

Years ago I swallowed hard and bought an entire roll of neutral grey from a photo supply company which I 'temporarily' hung using a rope threaded through the core so that it would roll out easily. Ceramics is murder on dark paper surfaces, so if it gets scuffed, I can just cut off a slab of it and roll out more. The roll rests on an antique table we bought for a song from an auction in the UK. The thing was stripped and all the grain risen, but after of years of curing in various basements, it's almost ready to refinish. heh

I rigged up two hurking big sheets of foamcore on either side of the table. I have another two smaller pieces of the stuff taped together like a book cover. I can place it anywhere in order to bounce light back to the underside of a piece if it needs it. Once upon a time, I got a bunch of roses in a shiny, gold foil box. And packrat, I, now use in the same way as the foamcore pieces to bounce a warmer light if needed.

For years I used an SLR on a tripod with an extended trigger shutter to take shots, but now have a great digital camera that I love to use. Believe it or not, we have a little portable tripod that has knocked around in our various houses for years that fits it perfectly. Today I'm going to locate that autoshutter trigger and see if it fits too. (I told you I was a packrat. Ya never know.)

Photos to come.

Really,

I promise.